Monday, December 15, 2014

BYOB (Build Your Own Boat)

Happy Monday! We were home all day today which called for some kind of new activity, especially towards the end of the day. I don't know about you, but I get so stir crazy on days that we don't leave the house! We (I) got this idea while watching an episode of Curious George. :)

First we did a "Will it Float?" test with several different items to see which materials would be best for building our boats. Then we used tape to create several different boats. Here's what ours looked like.

Next, we filled the tub and added a few drops of food coloring, because who doesn't like a green bath?! Plus it's Christmas time. Some boats floated better than others and some fell apart, but Rowin was in there for a good half an hour! He didn't want to come out until he was shivering and wrinkly.:)


We will definitely do this again. He loved it! And I think this would be fun for any age. If you have older kids, you could make it more of a science experiment. Have them make predictions about which materials will sink or float. Discuss their schema (what they already know) about boats to help them build one that will float. Discuss buoyancy. Have your child rebuild a model that doesn't float, using what he's observed from boats that do float....can you tell I'm a dorky teacher-brain mom? :)

Thursday, December 11, 2014

Christmas Tree Crafts


It's the most wonderful time of the year! Although, truth be told, while I have a million fun Christmas ideas that I had hoped to do with my kiddos, my son has been a bit of a Scrooge lately. (No one tells you that 3's are quite possibly much worse than 2's!) So many of my ideas have been received with a warm, "No, I don't want to do that!" Bahumbug. It's been a bit of a difficult season for me. I'm trying to learn when to make situations "teachable moments" about having a thankful heart/good attitude and when to throw my ideas and expectations out the window and just dance (for the 800th time) to Let it Go because that's what he really wants to do. Ah, motherhood.

We HAVE had a few crafty-mood days though so we've made a few different kinds of Christmas trees. As usual, all with supplies we had lying around.

Popsicle Stick Christmas Trees:


For these, we broke popsicle sticks, and glued them together to look like Christmas trees. We let them dry and came back to them the next day. I had planned on painting them green, but forgot we let a friend borrow our paints, so we used a green dot marker instead. (If you have paint, that would be cuter.) ;) After Rowin put some green dots on, we added some Christmas foam stickers. Then I drew on the garland with glue and Rowin poured the glitter on top. We may tie a string around one and turn it into an ornament. We'll see...


Scrap Paper Christmas Tree:


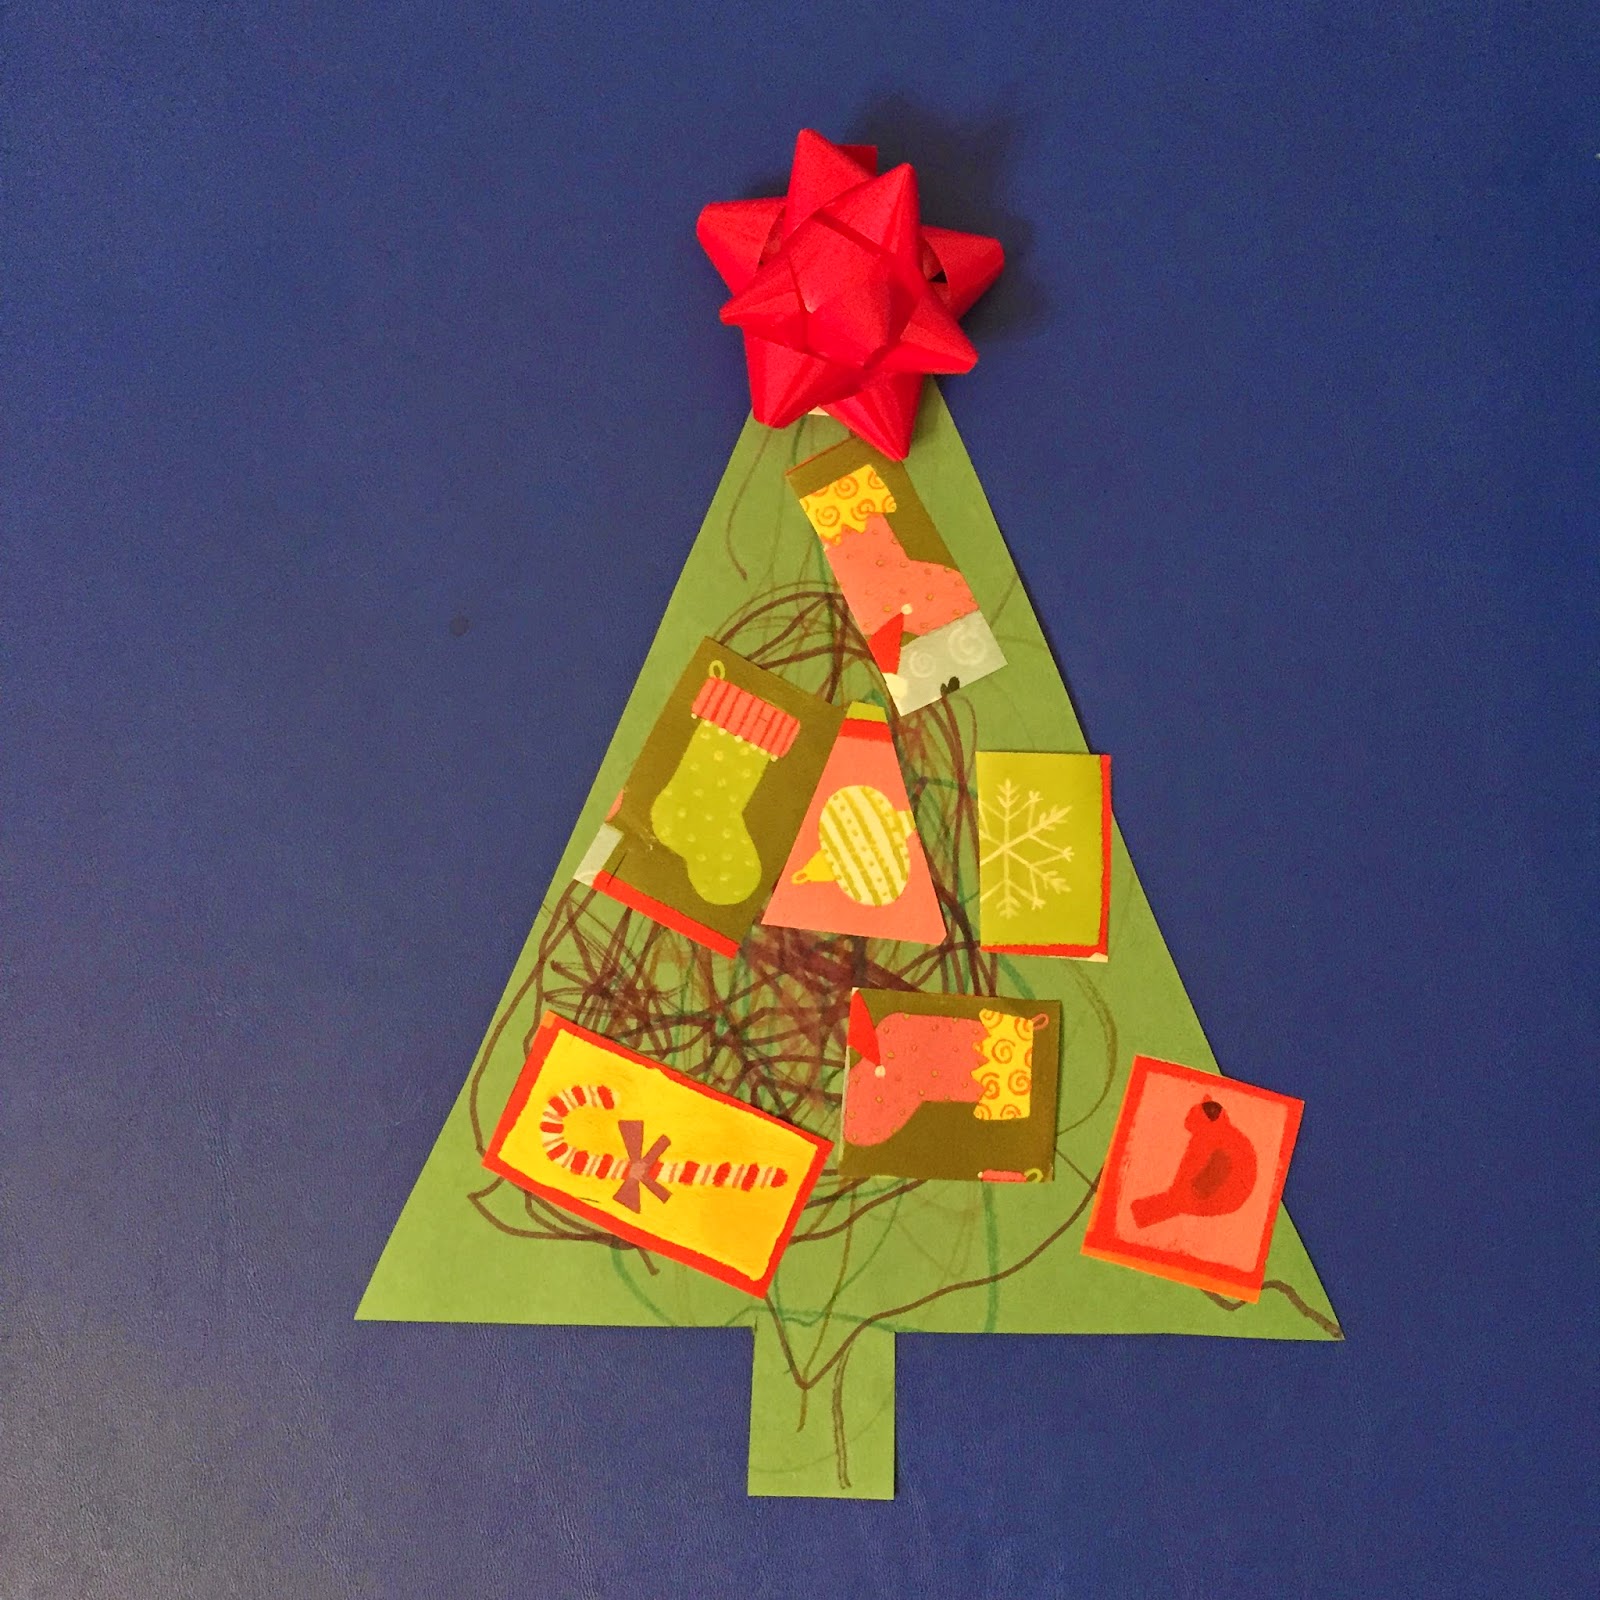
For this one, I cut a tree out of construction paper and had Rowin (and his buddy Ellie) color it. Then he glued on cut up pieces of wrapping paper and added a bow on top.

Handprint Christmas Tree:

For this tree, I traced Ro's hand and cut it out about five times. We glued them on, upside down, to look like a tree and added a trunk and a few stickers for ornaments.

Monday, December 1, 2014

Tape Roads

If you don't have boys, please don't give up on this blog! I know I post a LOT of car ideas because that's what we're into over here but I do have a little girl (5 months old) so I'm sure I'll have girly posts in the future. For now though, I'm sorry. This is another car activity. :)

The pictures are pretty self-explanatory, but just take a big roll of tape, and tape a bunch of roads all over your floor! You could add houses and buildings to make it a little town, you could make it a race track, an airport, train tracks...whatever mode of transportation your little one prefers! Have fun!


Magnetic Letter Match

I have several fun Christmas things that I want to share but I'm having some issues getting my pictures onto my computer, so those will have to wait. Here's a a quick little letter identification activity in the meantime!

All you need for this activity is a cookie sheet (this one is from the Dollar Store), magnetic letters, and a dry-erase marker. Write all of the letters A-Z on the cookie sheet and then have your child match the magnets. If your magnets are all capital letters, make sure you write the letters in all caps as well. :)


Monday, November 17, 2014

Cardboard Shape Stamps


Another super simple craft using stuff you have in your house...I found this idea at www.theimaginationtree.com. All you need is paint and a few toilet paper or paper towel tubes. We used three toilet paper tubes and cut them in half. Bend them into the shapes you want, dip in paint, and stamp away!
When you're done, if you think your little one will want to do this again, let the cardboard stampers dry, throw them in a ziploc bag, and store them away.


Wednesday, November 12, 2014

Thanksgiving Banner

I'm getting excited for Christmas already but I'm trying not to completely skip over Thanksgiving quite yet. Here's a little craft to get your kiddos to think about what they're thankful for. You could make this a million different ways, but here's what I used.


I ripped pages out of an old book and had Rowin color them. Then I cut those into triangles and cut larger triangles out of construction paper so that there would be a border. Next, we glued those together.

 After the triangles were all put together, I asked Rowin what he was thankful for. After he said, "bears and pictures" (who knows what goes on in that little head), I redirected the convo a little bit. :) "I helped him come up with "Daddy and Jesus" and then of course, Elsa and Anna made it on the banner too.


We punched holes, strung it with twine, and hung it in our dining room. Just something simple to start a conversation about being thankful this holiday season. Tweak it however you like!


Tuesday, November 11, 2014

Laundry Basket Race Car

Oh hello. Sorry I dropped off the planet for a while. No reason, I just did. I feel like we've done several fun little things since my last post, so I'll try to add a few more in the next week or so. 


Everything over here is either race cars or Frozen right now, so a few weeks ago, we made Rowin his own laundry basket race car. I dragged out the process of MAKING the race car, which I'm glad I did, because once it was done, he only played in it for about ten minutes. Ha!

First, I had him decorate his wheels (four paper plates) however he wanted. He went with the classic brown circles. Gotta love three year old boy art. I punched holes in them and he helped me string the yarn through the holes to attach them to the basket. Good fine motor practice!


Then I had him pick which number he wanted his race car to be. I wrote his number in a dotted line and had him trace over it-once for the front and once for the back. More fine motor practice, as well as number recognition.

 After we taped those on, we grabbed a helmet from the garage and a toy steering wheel that we had. If you decide to do this, make sure to include your little one in the process-that's where most of the learning happens! Plus, the anticipation is half the fun. Rowin was giggling the whole time we were "building" our race car because he was so excited!


Thursday, October 30, 2014

Leaf Masks

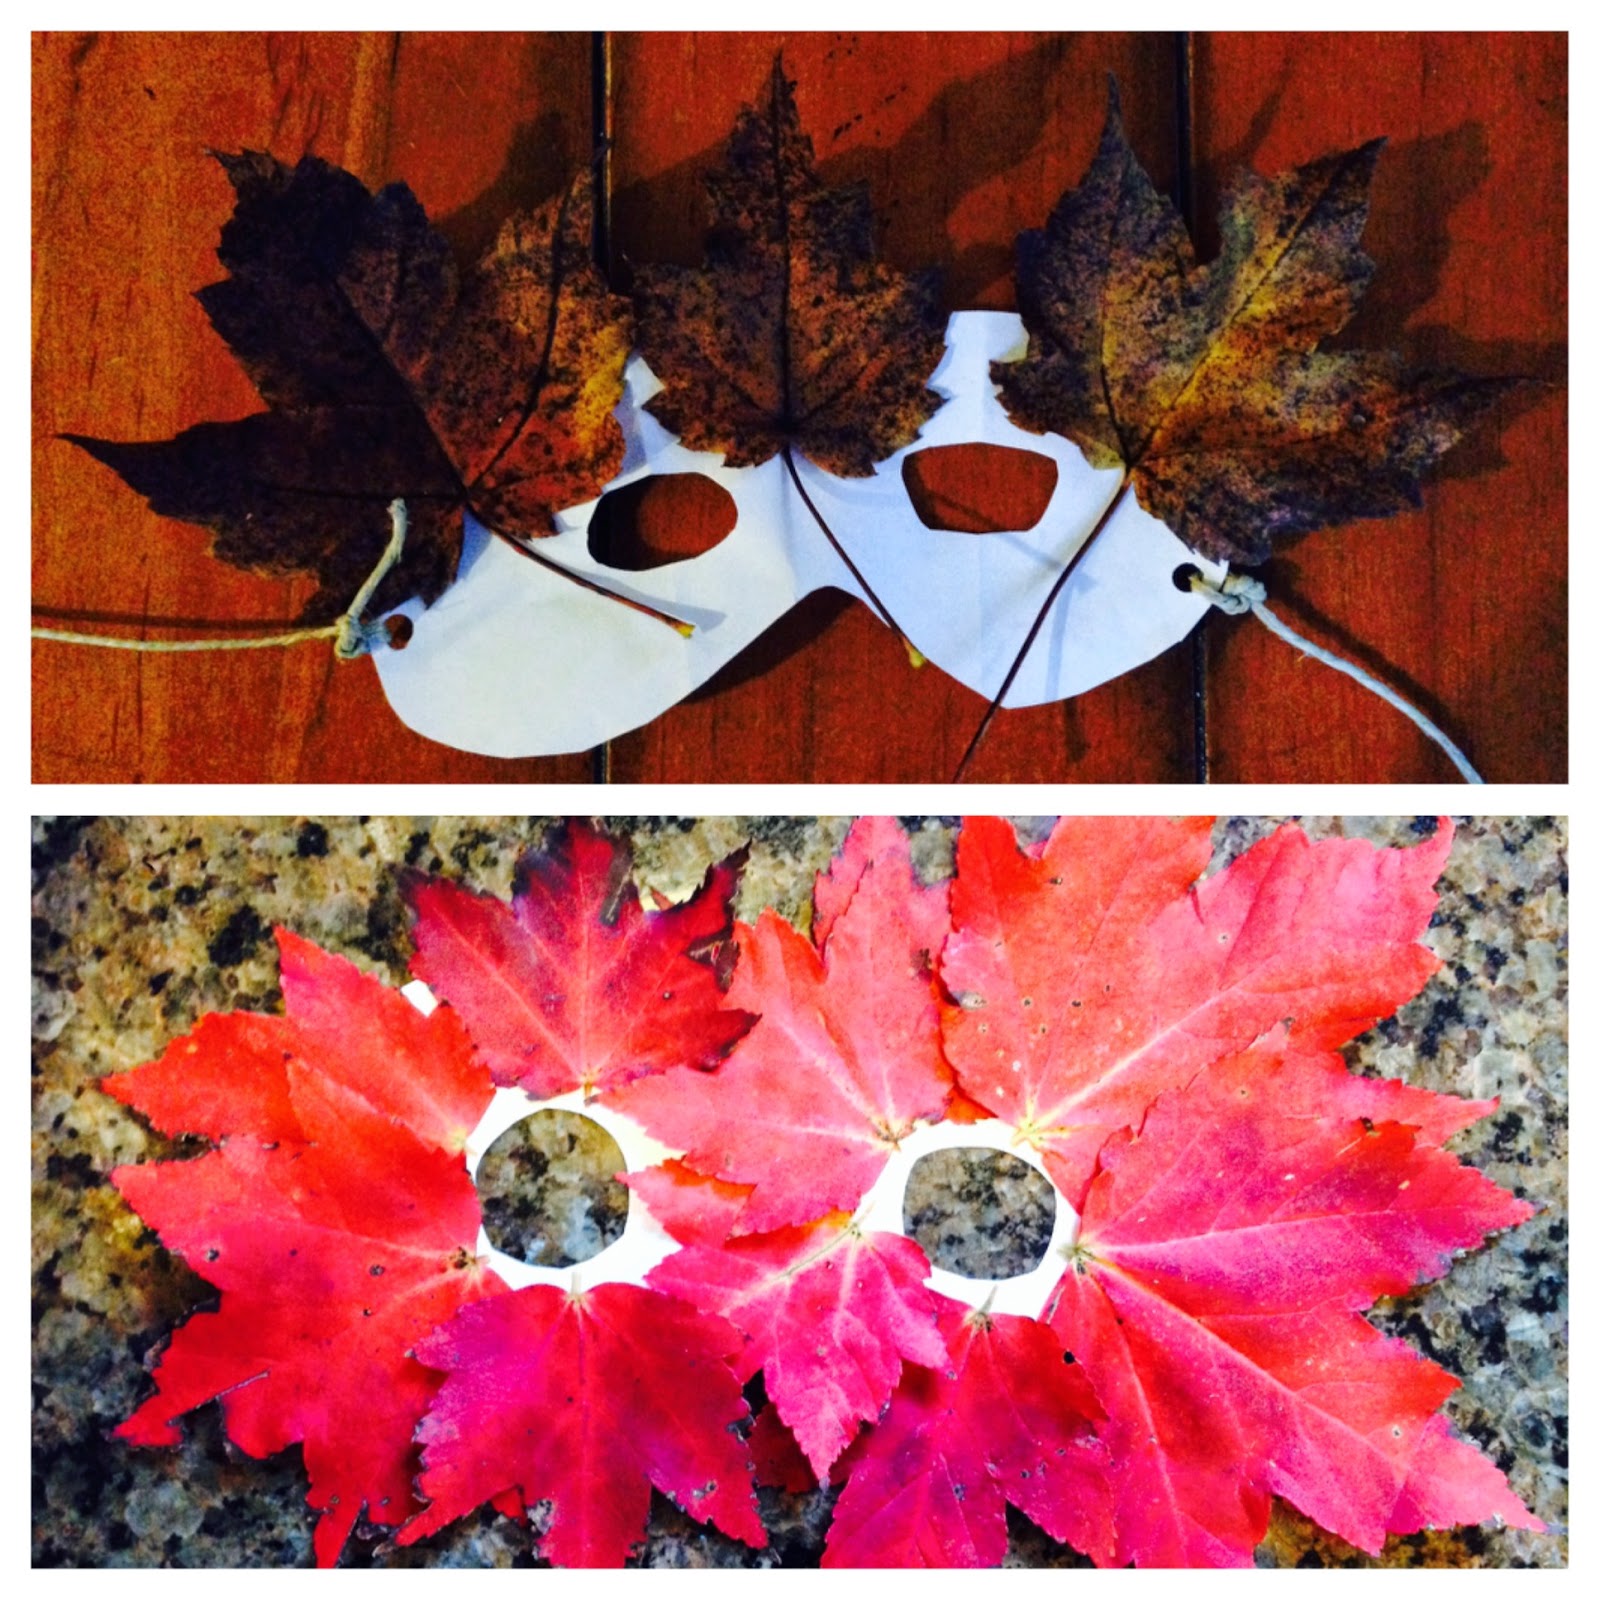
 I saw this on Pinterest somewhere but can't find it now...we just cut out a couple of paper masks, punched holes in the sides, and attached string to tie them on. I had Rowin go outside and pick out some leaves (of course, he found all of the brown ones). :) Then we just glued them on a few different ways.

He thought it was pretty fun to hide outside because he thought that no one could see him with his mask on. Have fun! ;)

Tuesday, October 7, 2014

Fall Crafts


We LOVE doing crafts in the fall (possibly me more than Rowin). Here are three super simple ones for you!

Fingerprint Tree

Search Google Images for a tree you like and have your kiddo add all of the leaves with their little fingers! Done.


Ours is on display on our clipboard wall :)

Apple Prints

Cut an apple in half, dip it in washable paint, and stamp it on the paper. We turned ours into a little banner and hung it in Rowin's room. 


Painted Pinecones 

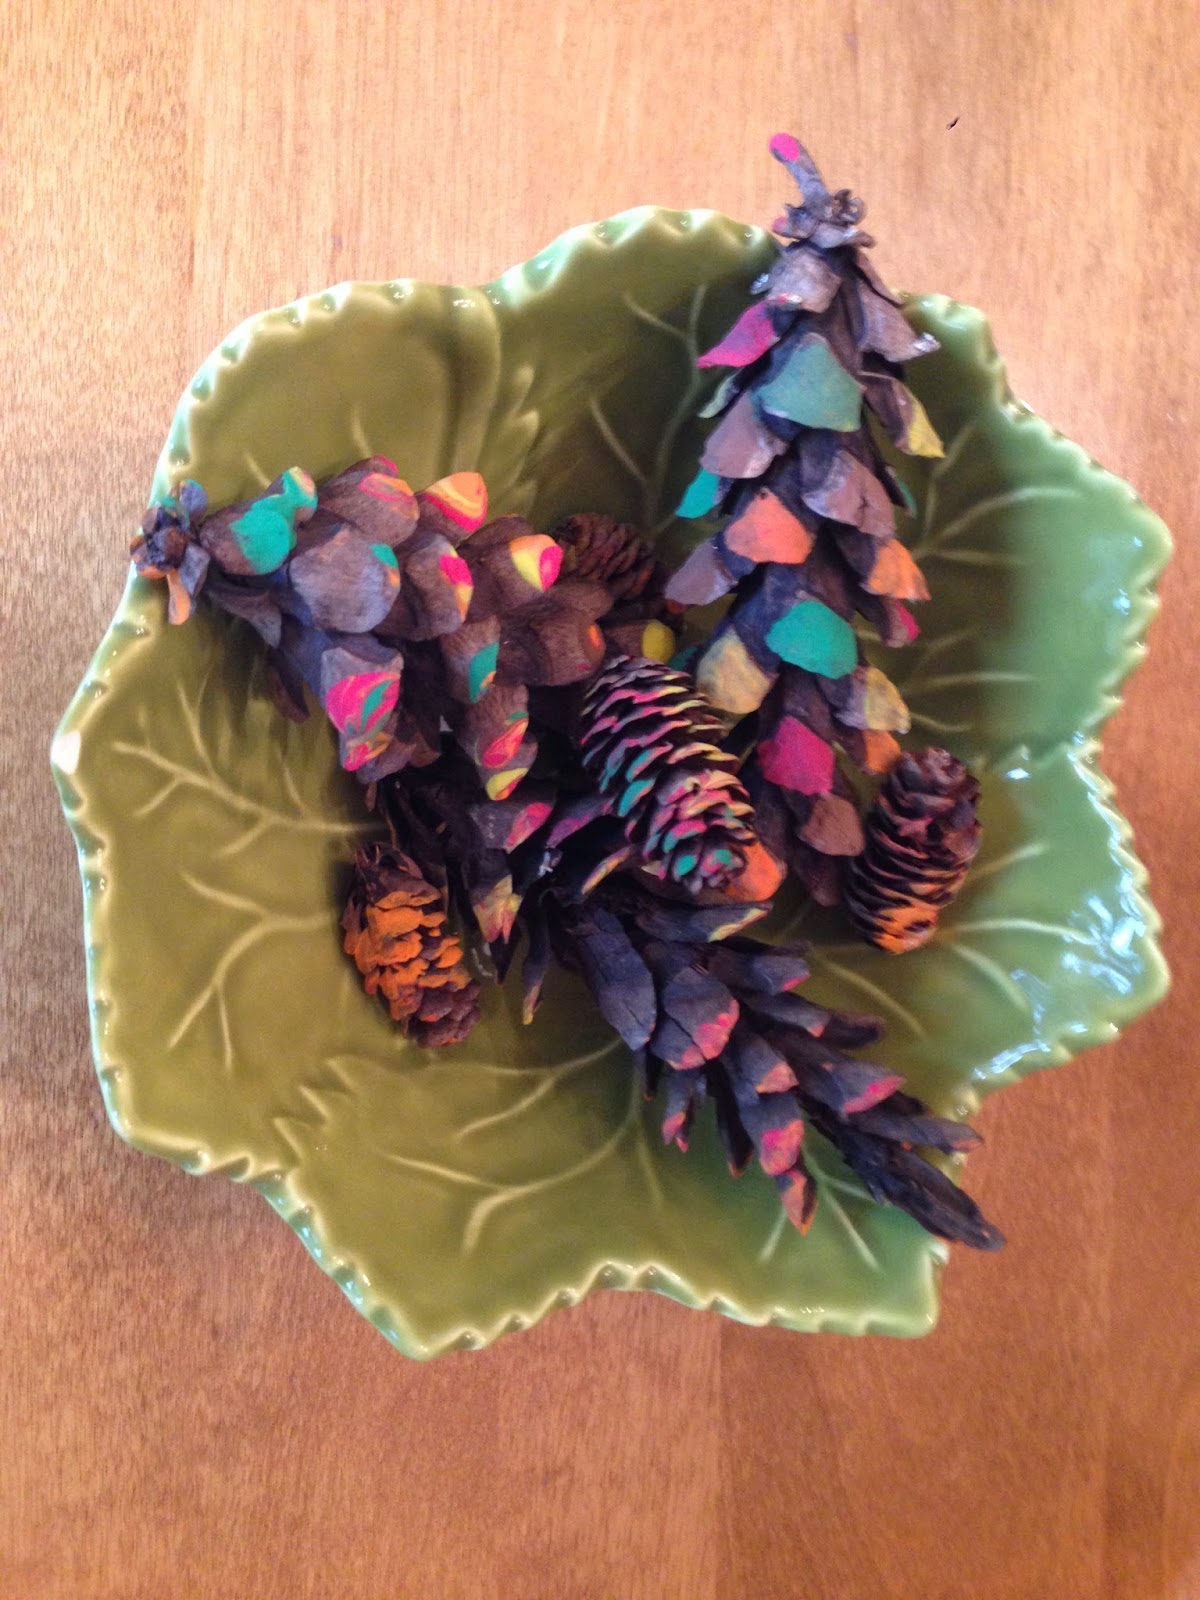
We have a huge pine tree in our front yard with millions of pinecones under it so we're always coming up with games and crafts to do with all of our pinecones. We painted some with paint brushes and the rest, we rolled in paint for kind of a tie-dye look. 


Happy Crafting!!

Monday, September 29, 2014

Nature Scavenger Hunts

What kid doesn't like to go on scavenger hunts? And fall is the perfect time to enjoy being outside and point out the details of God's creation to our kiddos.

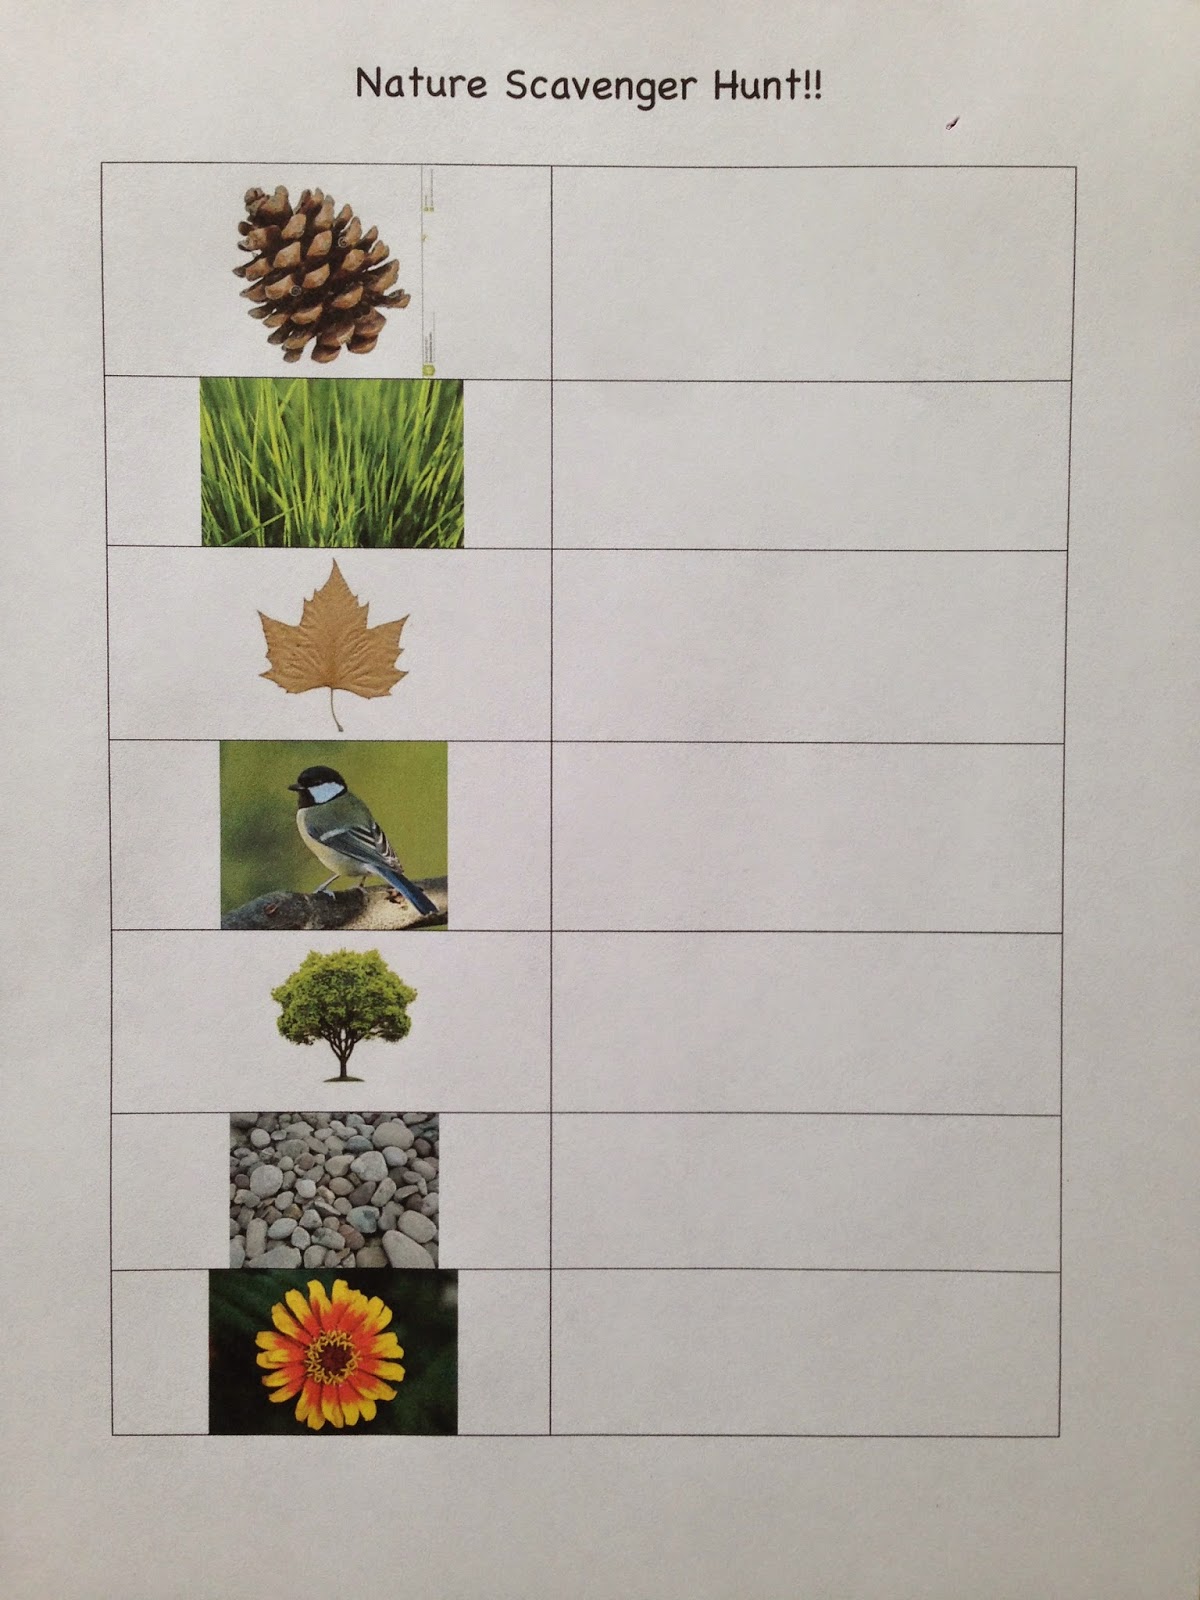
I made three different scavenger hunts. The ones with pictures are great for younger kiddos. The one with the descriptions I actually did with my second grade students and they loved it.

We just took a clipboard and a sheet of stickers and put a sticker on for each item. If your child is a little older and knows how to make tally marks, you could have them add a tally for each item that they find. Or you could have them draw a picture of each item that they see in the box too. However you want to do it!


Nature Scavenger Hunt with Pictures


Fall Leaf Scavenger Hunt with Pictures and Color Words


Nature Scavenger Hunt with Descriptions


Ok, so I'm really a technology dummy and couldn't figure out how to download these as attachments so that you could print them. If anyone would like to tell me how to do that, I'd be happy to repost them as PDFs for you. Otherwise, you can try to print them as images...OR if you leave your email in the comment section, I'll just email you my original documents. :)


Wednesday, September 24, 2014

Paper Strip Pumpkins


This is a super simple, quick craft for fall. It's basically just gluing but practices fine motor skills and following directions too. :)

I didn't take any pictures of the process but you're smart. You can figure it out. You need eight strips of orange paper, a brown stem, and a green leaf. Have your child put a small circle of glue on the end of one strip, then put another strip on top of it and keep adding glue in the same spot until you have all eight strips glued together like a big star. Then fold one strip over at a time and glue all of the other ends together. Once you have all of your strips in a ball, glue on the stem and leaf. Super cute! You can make different sizes or use red and green to make apples instead. 


Wednesday, September 17, 2014

Number Matching Car Game

I saw this idea on Pinterest and since Rowin plays with his little Hot Wheels cars every day, I thought this was perfect for him! Here's the original link: http://b-inspiredmama.com/2013/08/numbers-game-car-parking/ 

You will need ten (or more) cars. Number them however you like.


Then use a gift box and draw ten parking spots inside the box, numbering them 1-10. Also cut an entrance for the cars in the box. 


Have your child park each car in the matching parking spot. If you want to take it a step past visually matching two numbers, you can call one number at a time and have your child drive that car out of the garage. For example, you might say, "Car Number Six, come on out and go to the gas station!" Then your child actually has to identify the number 6 instead of just matching it. If this is a little difficult for your child, remind them that the numbers go in order and have them count, starting with the number one car, until they get to the number that you called. 


Tuesday, September 2, 2014

Counting Mini Book

This is similar to other counting books we've made. You probably have most or all of the supplies on hand. You will need:

*Cardstock paper or 5X7 cards
*Markers
*Construction Paper
*Any kind of paper punch out (what are those called?) We used a heart.
*Hole punch
*Anything to bind the pages together (string, zip ties, metal rings, etc.)

First, punch out the shapes, using a different color for numbers 1-10. Then make a page that matches each set (write "1 red heart, 2 green hearts", etc.) Rowin liked helping me punch out the hearts. While I made the pages, I had him decorate the front cover.


 Next, we mixed up all of the hearts and I showed him one page at a time. We "read" each page together. Obviously my two year old can't read, but it's not too early to start working on number and color recognition, pointing to one word at a time as we read. After we read the page, he found the matching hearts and glued them on.


Here are a few pages from our book. When he was done, I hole punched the pages and bound them together with mini-colored zip ties, but you could use whatever you have. 


Hang onto it to practice counting, number recognition, and color words!

Monday, August 18, 2014

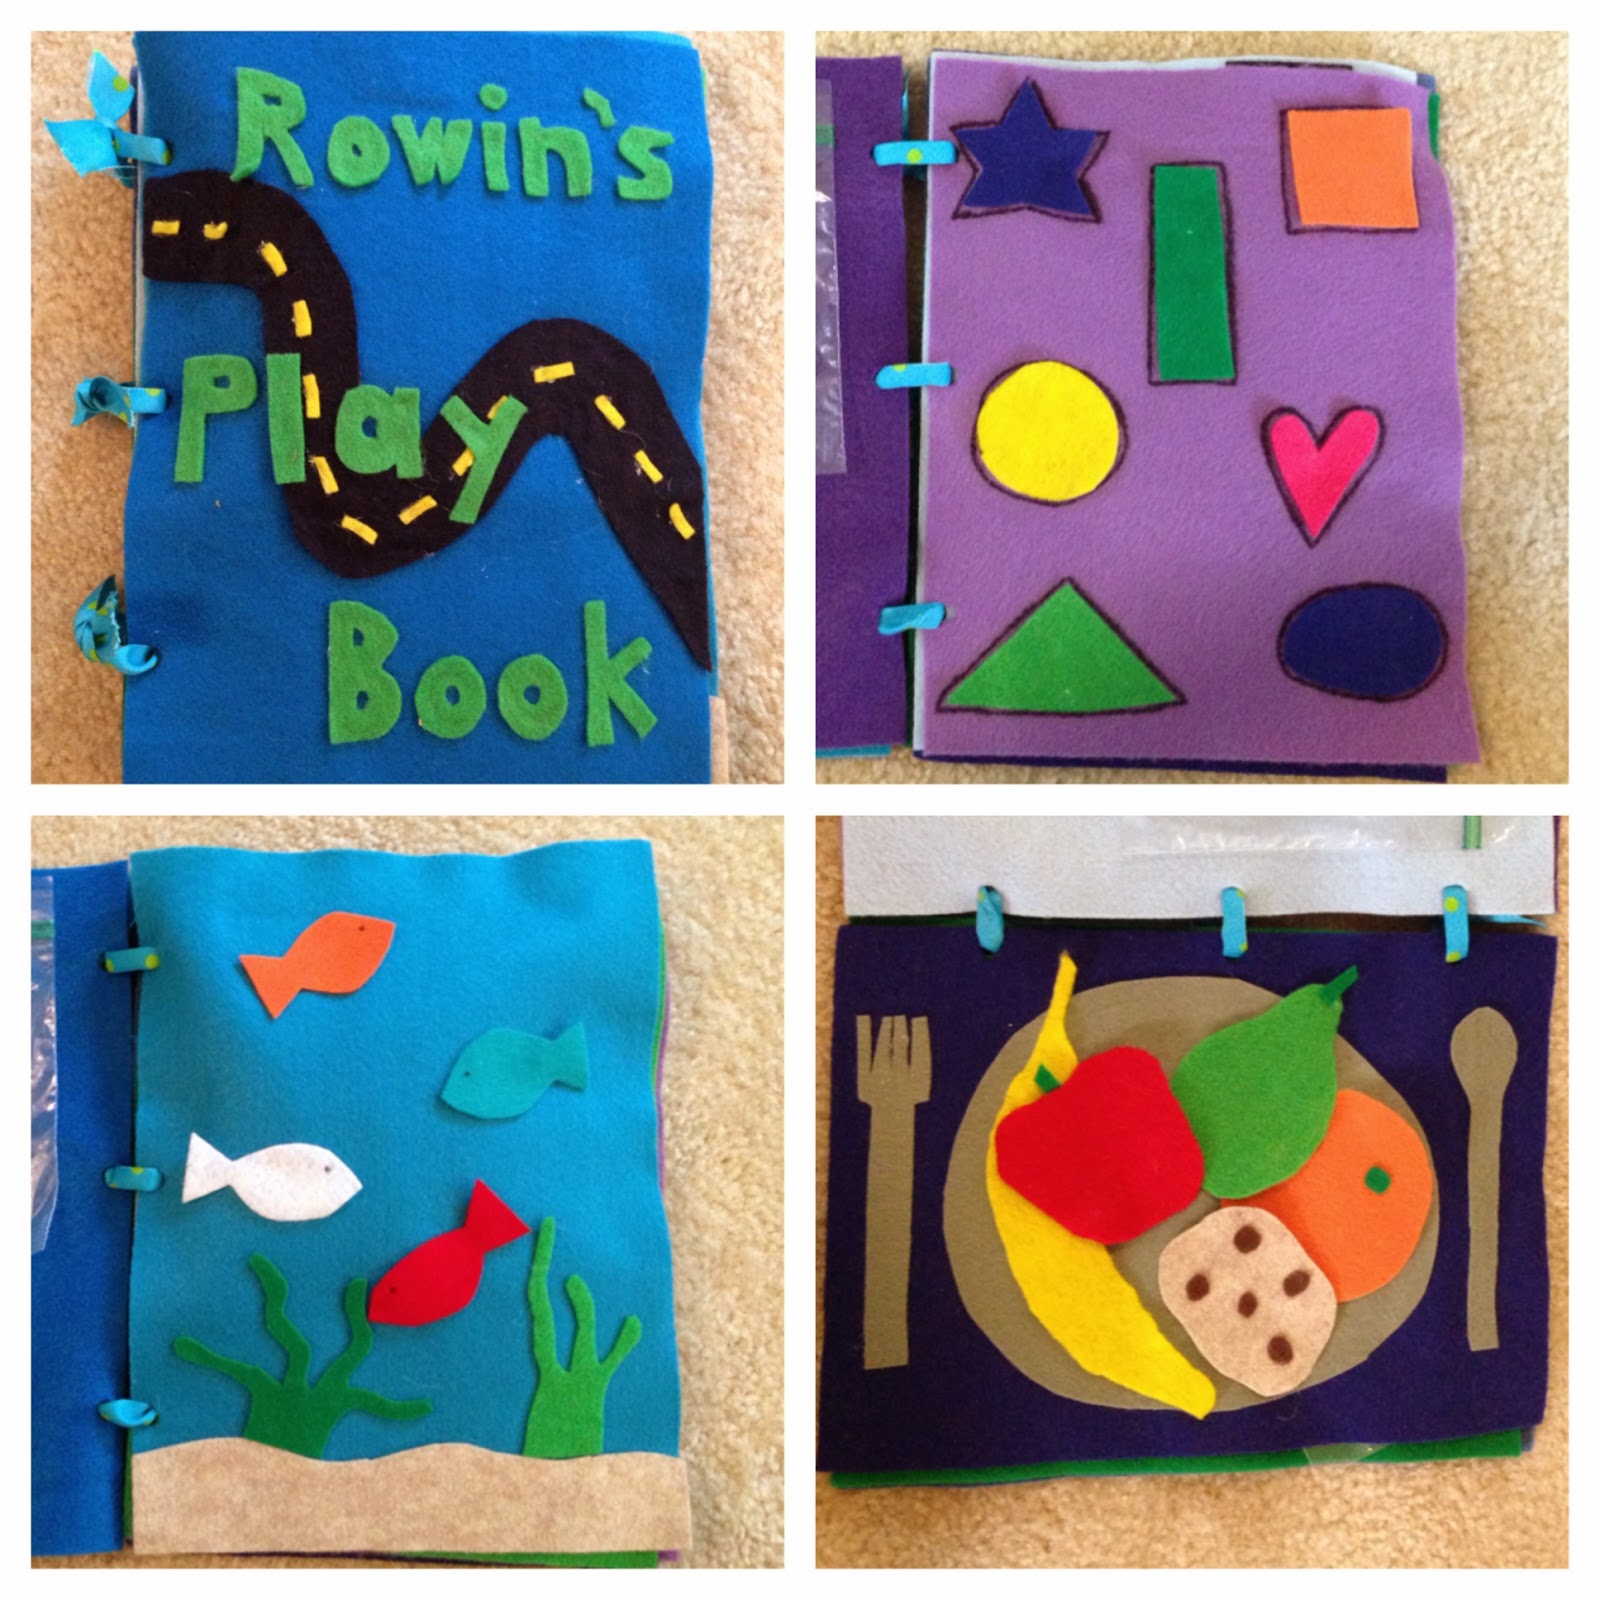
Felt Play Book


I'm gonna go ahead and tell you that I did NOT make this since having a baby this summer. I made it about a year ago but Rowin still pulls it out every so often. He played with it today so I snapped a few pics and thought I'd share. 

I don't know how to sew (even though my mom has tried to teach me countless times) so this is a 100% hot glue project. It does take some time but anyone could do it. You will need:
*Felt-a variety of colors
*Hot glue gun + glue
*Permanent or fabric marker
*Fabric scissors
*Ribbon or string
*Hole punch
*Ziplock bags

For the cover, you can decorate it however you want. Then punch three holes on the left side. This will be how you bind the book with ribbon later on. Here's what mine looks like.


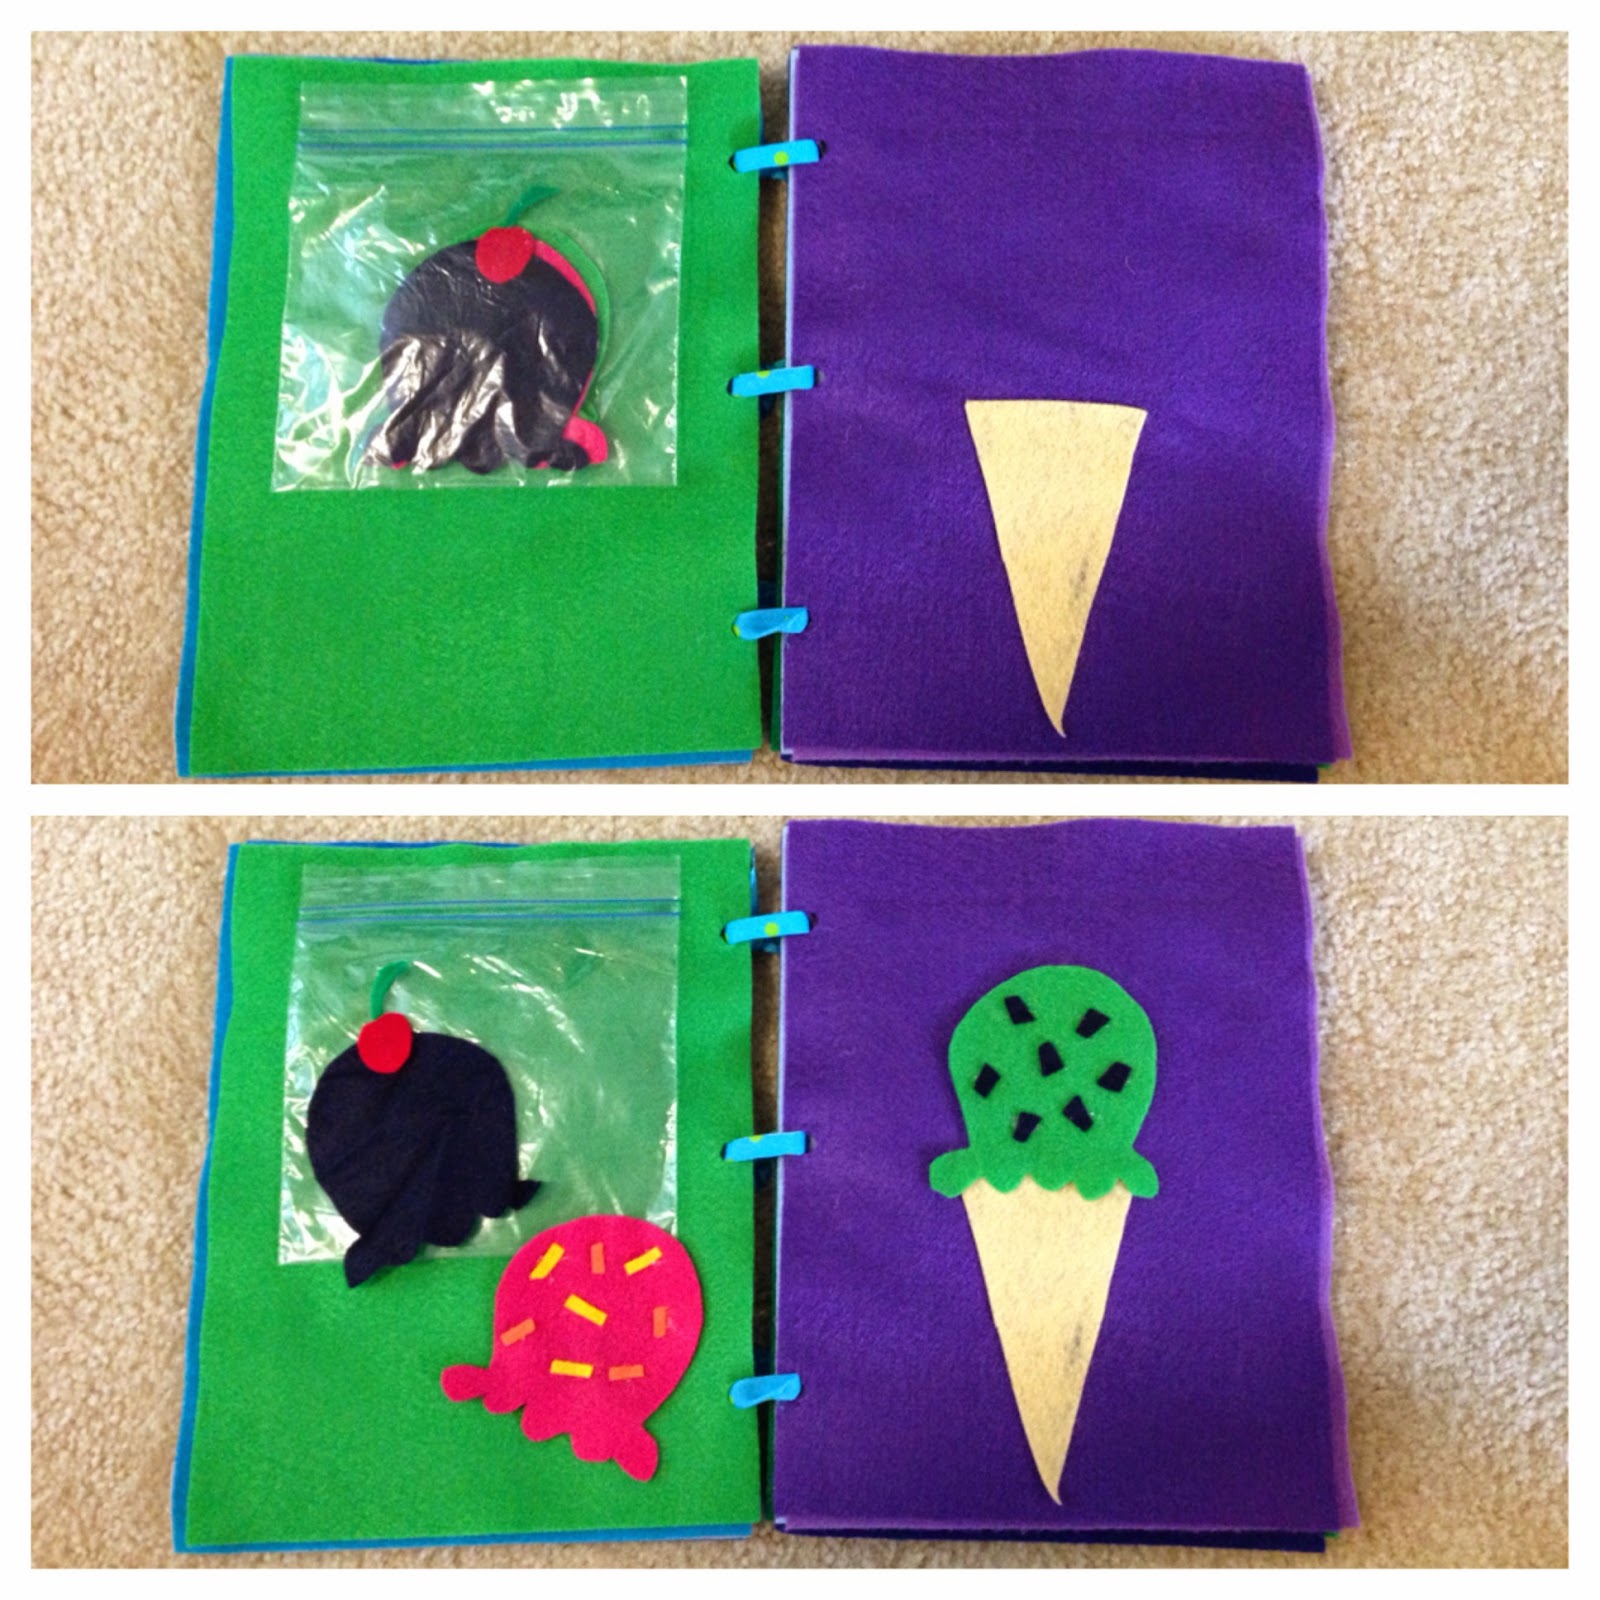
On the back of the front cover, I hot glued a ziplock bag. Just put a line of glue across the top of the bag so that it sticks to the page but you can still open it. I did this for every page-the back of one page held a ziplock bag with the pieces for the next page. You can make the pages whatever you'd like. Here's what I did:
*Fish
*Butterfly
*Ice Cream Cone
*Shapes
*Cars
*Food
*Name
*Rainbow

Here are pictures that show each page with and without the pieces.


I made a couple of these for friends and some other pages that I did were dolls (where you add the clothes) and flowers (where you add the flowers to the stems).

I think the pictures are pretty self-explanatory. Some of the pages have things hot glued on and some pages just have things drawn or outlined in permanent marker. The pieces for each page are stored in the ziplock bag.

Once you've made all of your pages, hole punch every page, making sure that they all line up. I also added an extra piece of felt for the "back cover". Then tie a piece of ribbon through each hole to bind the pages together.

Time consuming, yes. I'm not gonna lie. But it's literally just cutting and gluing. I think I made the whole thing in about three nap times.