Tuesday, September 2, 2014

Counting Mini Book

This is similar to other counting books we've made. You probably have most or all of the supplies on hand. You will need:

*Cardstock paper or 5X7 cards
*Markers
*Construction Paper
*Any kind of paper punch out (what are those called?) We used a heart.
*Hole punch
*Anything to bind the pages together (string, zip ties, metal rings, etc.)

First, punch out the shapes, using a different color for numbers 1-10. Then make a page that matches each set (write "1 red heart, 2 green hearts", etc.) Rowin liked helping me punch out the hearts. While I made the pages, I had him decorate the front cover.


 Next, we mixed up all of the hearts and I showed him one page at a time. We "read" each page together. Obviously my two year old can't read, but it's not too early to start working on number and color recognition, pointing to one word at a time as we read. After we read the page, he found the matching hearts and glued them on.


Here are a few pages from our book. When he was done, I hole punched the pages and bound them together with mini-colored zip ties, but you could use whatever you have. 


Hang onto it to practice counting, number recognition, and color words!

Monday, August 18, 2014

Felt Play Book


I'm gonna go ahead and tell you that I did NOT make this since having a baby this summer. I made it about a year ago but Rowin still pulls it out every so often. He played with it today so I snapped a few pics and thought I'd share. 

I don't know how to sew (even though my mom has tried to teach me countless times) so this is a 100% hot glue project. It does take some time but anyone could do it. You will need:
*Felt-a variety of colors
*Hot glue gun + glue
*Permanent or fabric marker
*Fabric scissors
*Ribbon or string
*Hole punch
*Ziplock bags

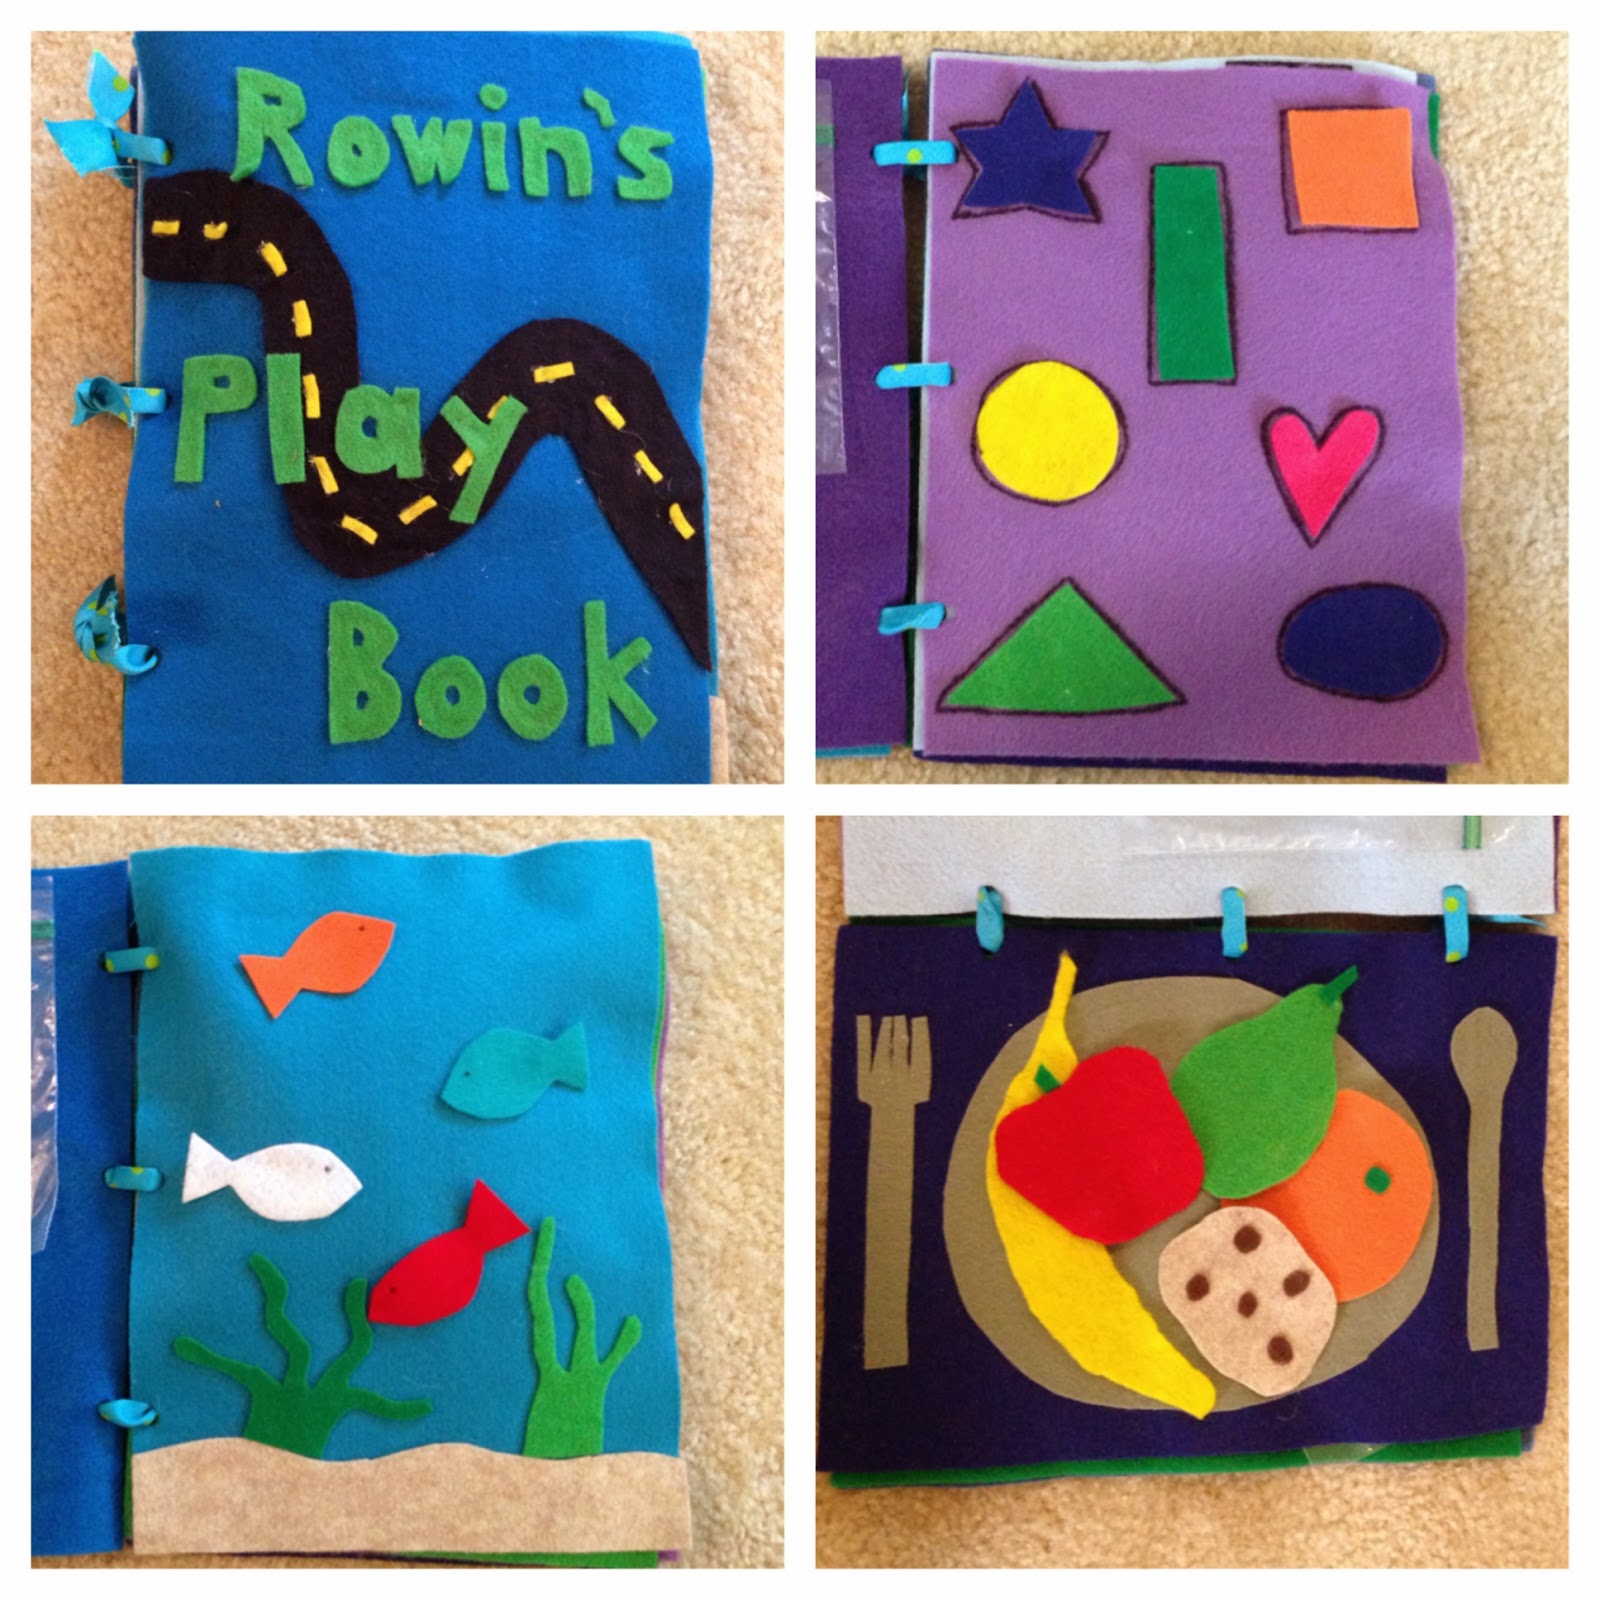
For the cover, you can decorate it however you want. Then punch three holes on the left side. This will be how you bind the book with ribbon later on. Here's what mine looks like.


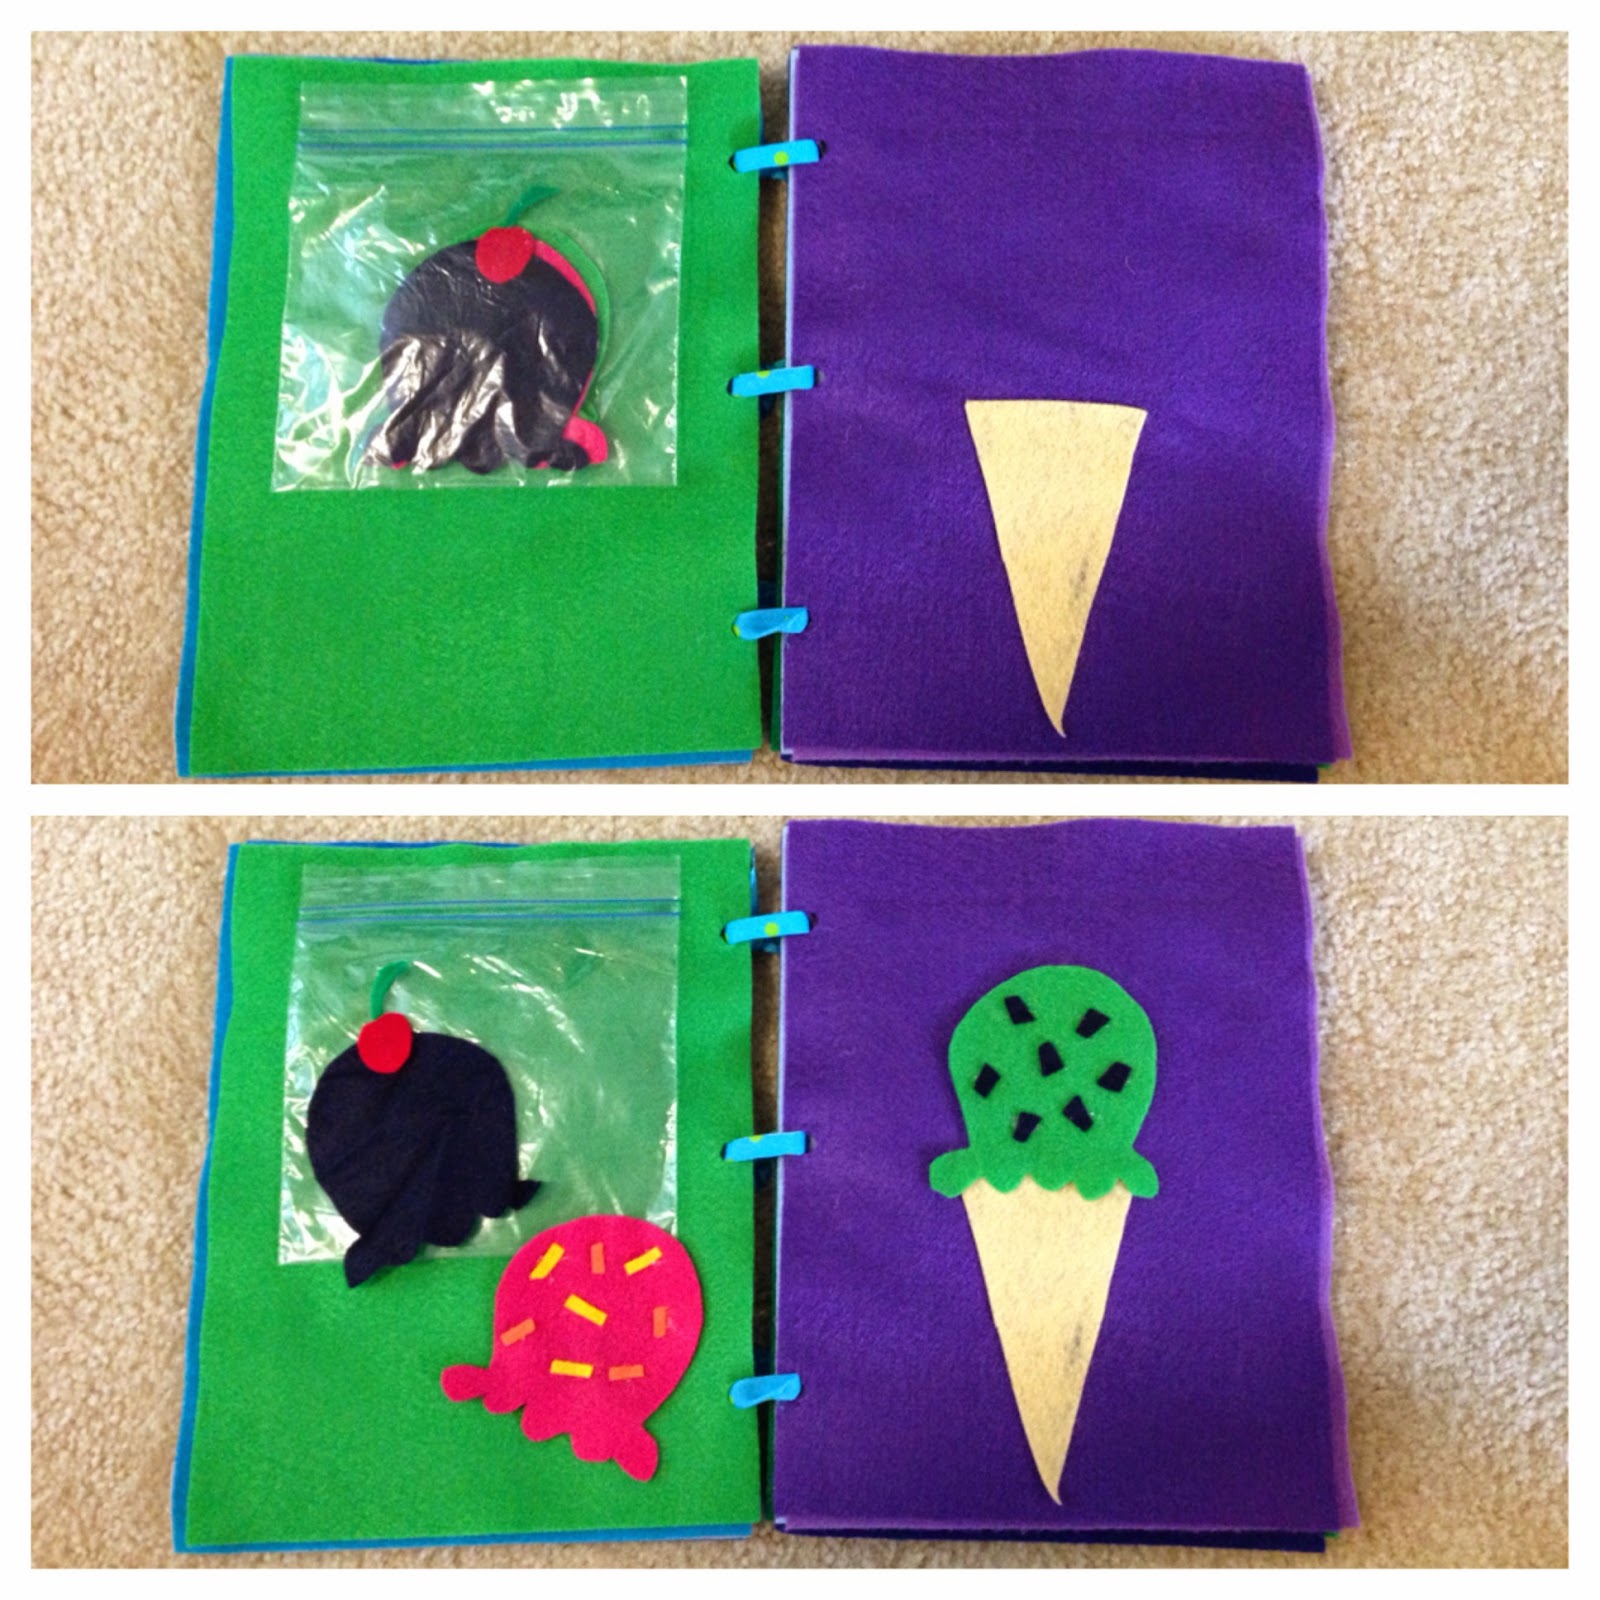
On the back of the front cover, I hot glued a ziplock bag. Just put a line of glue across the top of the bag so that it sticks to the page but you can still open it. I did this for every page-the back of one page held a ziplock bag with the pieces for the next page. You can make the pages whatever you'd like. Here's what I did:
*Fish
*Butterfly
*Ice Cream Cone
*Shapes
*Cars
*Food
*Name
*Rainbow

Here are pictures that show each page with and without the pieces.


I made a couple of these for friends and some other pages that I did were dolls (where you add the clothes) and flowers (where you add the flowers to the stems).

I think the pictures are pretty self-explanatory. Some of the pages have things hot glued on and some pages just have things drawn or outlined in permanent marker. The pieces for each page are stored in the ziplock bag.

Once you've made all of your pages, hole punch every page, making sure that they all line up. I also added an extra piece of felt for the "back cover". Then tie a piece of ribbon through each hole to bind the pages together.

Time consuming, yes. I'm not gonna lie. But it's literally just cutting and gluing. I think I made the whole thing in about three nap times.

Friday, August 8, 2014

Spoon Matching Games

So, clearly I am a no-frills mom. I still pin all of the adorable ideas I see on Pinterest that would take me five hours to prepare and OCCASIONALLY I'll attempt a more elaborate craft or project, but for the most part, I like to keep it simple. Real simple. Like be able to whip it up in two minutes with a newborn on my lap simple. This is one such activity.

I grabbed a handful of plastic spoons and a permanent marker, drew a shape on the back of each spoon (two of each shape so they each had a match), and then mixed them all up and had Rowin find the matches and put them together.


We made another matching game with numbers. I wrote the numbers 1-5 on the backs of spoons and then drew dots to correspond with each number on the backs of five more spoons. Rowin had to match the numbers with with the dots. 


I threw each set of spoons into a ziplock bag and labeled them so that we can pull them out to play with another day. 


If these concepts are too easy for your child, you could do capitol and lowercase letters or numerals and number words.

Tuesday, August 5, 2014

Painted Rocks

Rowin is a little obsessed with throwing rocks right now. He is always on the lookout for rocks. We actually have a rock jar in our kitchen for him to keep his rock treasures in and when it's full, we walk down to the river so he can throw them all in. Ah, to be a two year old!

So since we usually have a rock stash handy, we decided to paint them before throwing them in the river this time. We used acrylic paint which will stay on if you wanted to keep your painted rocks. (They also stain though, so be careful!) Water colors didn't work very well. This would be fun for any age. If your child really likes this activity, grab several rocks and hang onto them for the winter when they're all burried under the snow!


Saturday, July 26, 2014

Letter Collage

This is another idea I adapted from Family Fun Magazine. Draw a big letter or shape on a piece of paper and have your child fill it in with small, cut up pieces of construction paper or tissue paper. I made a big letter R because Rowin is still learning the letters in his name. For little ones, this is good practice using a glue stick and working within a given space. For older ones, a fun craft!


Thursday, July 24, 2014

Nature Prints

This was an idea I found in Family Fun Magazine. First, we went outside and searched for some interesting items in our yard.


Then we came in and pressed each item into play dough to see what kind of print it would make.


Some of them turned out really cool!


Sunday, July 20, 2014

Car Wash

So, I realize this blog was initially intended to give you more educational ideas...I'll get back to that. :) For now, it's summer and I have a newborn...SOOO, we're keeping it REAL simple!

We've had some perfect summer days lately, so we busted out our water table, found all of Rowin's little cars, and had a car wash! We filled one side with soapy water and threw in a couple wash clothes and filled the other side with just water. Rowin would wash and rinse each car and then toss it on a big towel to dry in the sun. Next time, I think we'll take out all of his bigger trucks for a cleaning. :)